This easy DIY wine bottle crate holds up to 12 bottles of wine, making it the perfect gift for the wine lover on your list. By making a few simple cuts in a piece of 3/16” plywood using the Ryobi One+ circular saw, jigsaw, and sander tools, and inserting the cut panels into a Crates and Pallet Large Wooden Crate from homedepot.com, the wine bottle crate will be ready for a bow and under the tree in about 45 minutes. Leave it unfinished or dress it up with paint or stain, and add a bottle or two of their favorite vintage for a personal gift that will be sure to please.
Time to complete:
45 minutes
Tools Used:
Ryobi One+ Circular Saw
Ryobi One+ Jigsaw
Ryobi One+ Sander
Measuring Tape
Straight Edge
Pencil
Materials used:
(1) Crates & Pallet Large Wooden Crate (homedepot.comm sku 203153338)
(1 sheet) 3/16" birch plywood
(1 qt) Varathane Wood Stain in Kona (optional)
(1 qt) Varathane Polyurethane in Clear Stain (option)
Printed templates on 11" x 17" paper (optional)
Templates
(Print on 11" x 17" paper for correct scale)
Steps:
Note: Templates have been provided for steps 1-4 as a shortcut. The templates will need to be printed on 11" x 17" paper for the correct scale.
Step 1: Cutting along the wood grain of the 3/16” plywood, use the Ryobi One+ circular saw to cut two rectangles measuring 16-1/2”W x 9-1/4”H. Set aside.
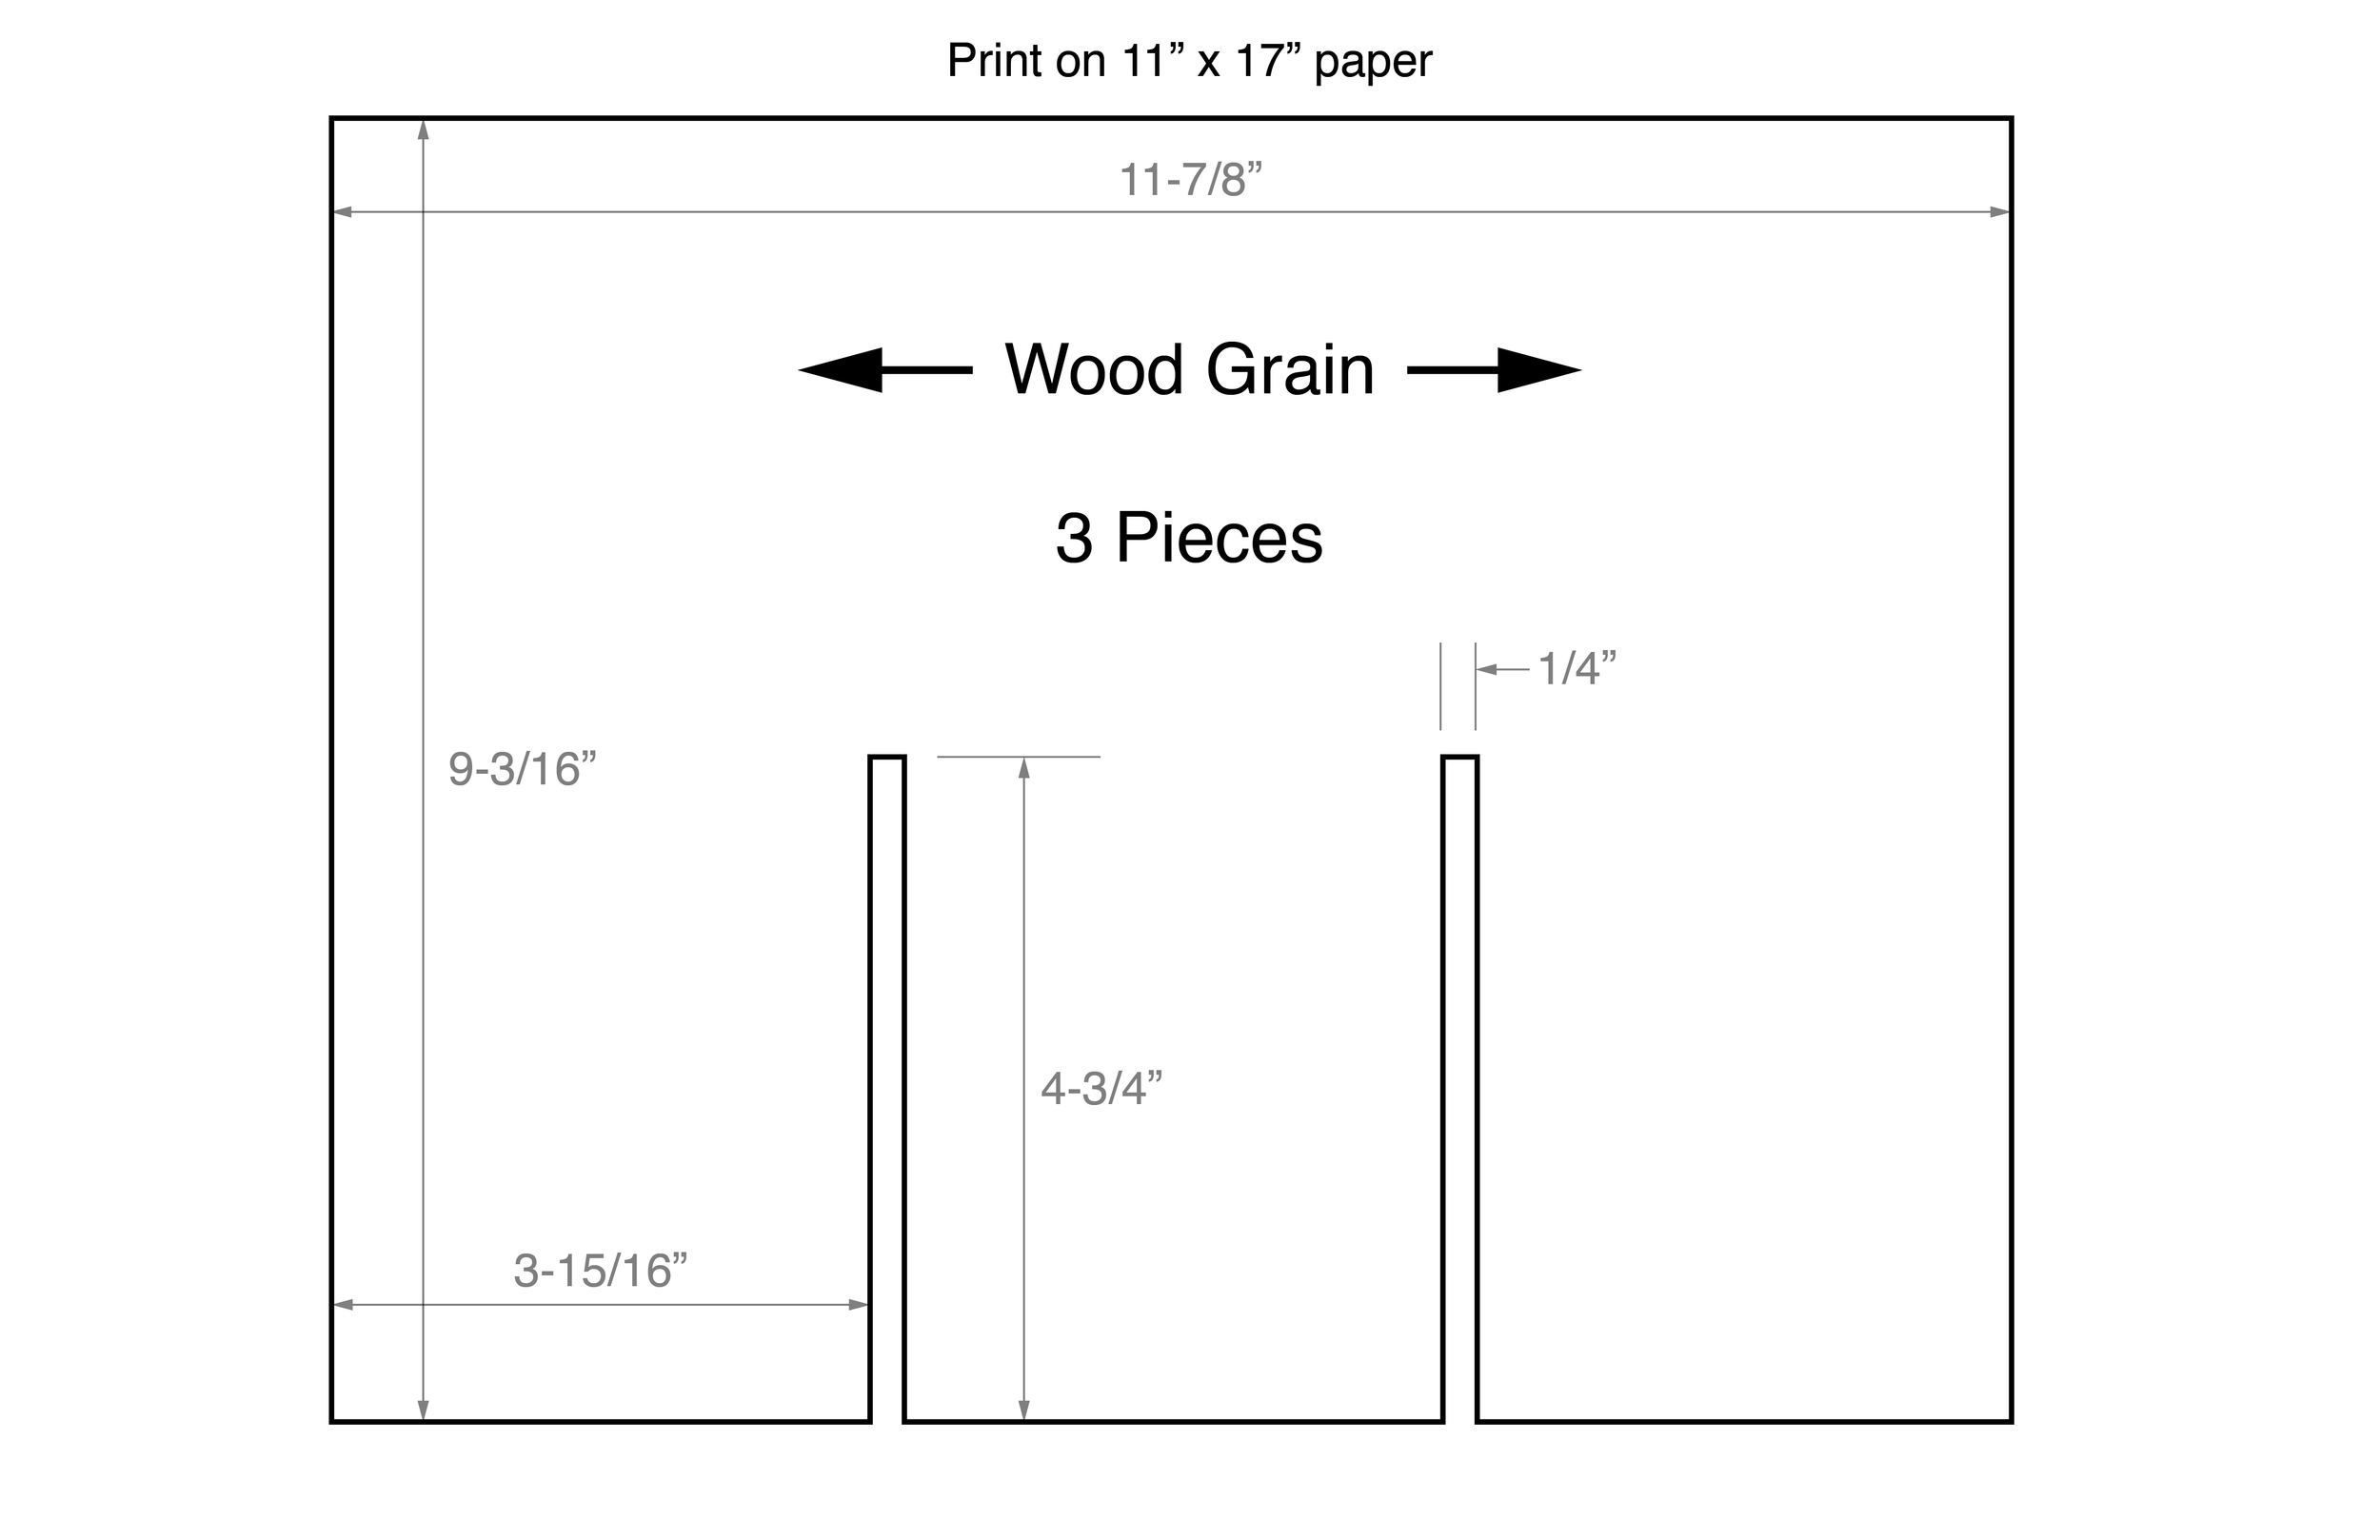
Step 2: Continuing to cut along the wood grain, use the Ryobi One+ circular saw to cut three more rectangles from the 3/16” plywood measuring 11-7/8”W x 9-1/4”H.
Step 3: Using the two larger rectangles from Step 1 and measuring along the longest side, from the shorter edge, measure over 3-15/16” and make a mark. From there, measure 4-3/4” vertically and draw a straight line up. From there, measure over 1/4" and draw a horizontal line. Then draw a straight line back down to the edge of the panel. Draw two more inserts each 3-15/16” apart. Draw the 3 inserts on both of the longer panels and cut the 3 inserts out of each panel using a Ryobi One+ jigsaw. Sanding with the grain, use the Ryobi One+ sander to smooth any edges or splintering caused by the saw cuts.
Step 4: Using the three smaller rectangles from Step 2 and measuring along the longest side, from the shorter edge, measure over 3-15/16” and make a mark. From there, measure 4-3/4” vertically and draw a straight line up. From there, measure over 1/4" and draw a horizontal line. Then draw a straight line back down to the edge of the panel. Draw one more insert 3-15/16” apart from the first. Draw the 2 inserts on all 3 of the shorter panels and cut the 2 inserts out of each panel using a Ryobi One+ jigsaw. Sanding with the grain, use the Ryobi One+ sander to smooth any edges or splintering caused by the saw cuts.

Step 5: Interlock the two larger rectangles with the three smaller rectangles where the inserts were cut in order to form a grid design.
Step 6: Push the entire interlocking grid inside of the Crates and Pallet Large Wooden Crate.
Step 7: (Optional): Paint or stain the wine bottle crate for a customized look.
The pictured wine bottle crate was stained with Verathane Wood Stain in Kona and then coated with Verathane Polyurethane in clear satin. Paint the stain on and then immediately wipe off with a sponge. Let stain dry and finish with a coat of the clear satin polyurethane.